
The origin of TOFD
TOFD is Time of Flight Diffraction (TOFD), which is a non-destructive test (NDT) method based on the time difference of ultrasonic diffraction. The principle is different from the normal pulse back-wave ultrasonic test method: ① defect diffraction wave is irrelative to the defect angle; ② the defect location quantitative error is irrelative to the amplitude of the wave. It holds significant performance, low cost, simple process, safe environmental character, excellent prospects for further development. China has confirmed it as a defect inspection method applied on the special equipment.
TOFD detection principle
Ultrasonic TOFD method makes use of a pair of longitudinal wave probes of the same frequency, size and angle for flaw detection. One is used as the transmitter probe and the other serves as the receiver probe. The relative positions of the two probes are put on the two sides of the weld with their center of the probe staying on the same line. The transmitter probe transverse longitudinal waves, and a direct wave is received first at a defect-free area by the receiver probe, the wave travels at a longitudinal wave velocity between the two probes and then probes can receive a back wave.
If there are cracks defect in the workpiece, both ends of the defect in addition to the ordinary reflected waves, a diffraction wave is generated at the upper and lower flaws of the defect, whose diffraction energy comes from the end of the defect.
The two beams of diffracted waves occurs between the straight wave and the bottom reflected wave. The signal at both ends of the defect will be distinguishable in time-line, and the magnitude of the defect height can be determined based on the time difference of diffracted wave signal propagation.
Difference from the conventional pulse ultrasonic testing
TOFD detection principle has two important differences compared with the conventional pulse ultrasonic testing method:
① Trapped shot signal is irrelative to the defect angle;
② positioning, quantitative error is irrelative to amplitude of the signal;
This is the reason why TOFD technology has developed so rapidly
Adapting TOFD to detect the crack of thin wall surfacing layer of the weld
The surface defects of the weld layer usually are:
① surface defects includes cracks, porosity and slag;
② weld internal defects are the general slag inclusions and not fused;
③ weld and the base metal is not combined;
(4) In the reheating cracks (texture) in the heat affected zone of base metal under the overlay layer, the tendency is almost perpendicular to the base metal surface; whus when the thickness is less than 5 mm, the sensitivity and accuracy is very low.
Computer Applications in TOFD Test
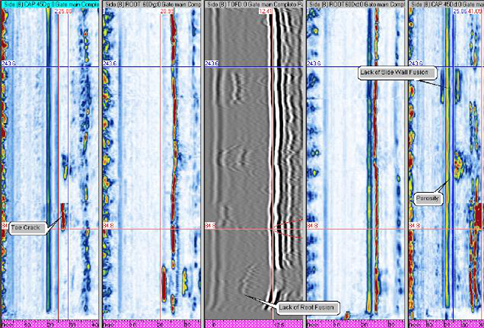
TOFD detection system makes use of windows XP platform and conduct the customized development base on LabVIEW; the ultrasound acquisition card and personal PC is integrated to implement the detection signal acquisition, storage, image display and so on. Present new crack detection technology ---- TOFD ultrasonic detection has a good effect in the welding defects detection, this cannot be reached by other detection methods.
Crack height calculation
The detection of the height of the crack is usually calculated by measuring the propagation time difference Δt of the diffracted waves generated by the direct wave propagating along the surface of the workpiece and the end of the defect. As the longitudinal wave velocity V of the workpiece and 2 probe spacing 2S is known, the depth of burial at the top and bottom of the defect is given by:
d = 1/2 [Δt2 v2 + 4 Δtvs] 1/2
Where: v - longitudinal wave velocity
△ t - straight wave and diffracted wave propagation time difference between;
S - 1/2 probe spacing.
The crack heights in the thickness direction is derived from the depth of the upper and lower depth of buried defects: H = d1-d2
Where: H - crack height;
D1 - the distance between the upper end of the crack and the upper surface;
D2 - the distance between the lower end of the crack and the upper surface;
Preparation of simulation test block
EDM and wire cutting are used to prepare the various sizes of artificial linear cracks that is to simulate the base metal reheating crack defects. The base material of test block is ordinary carbon steel, and the overlay welding layer is alloy steel, the size of sample is 270mm × 30mm × 40mm, and eight artificial cracks with unequal height and width of 0.2mm are added at equal distance on the surfacing layer of the test block.

TOFD Principle Schematics

TOFD Diagram